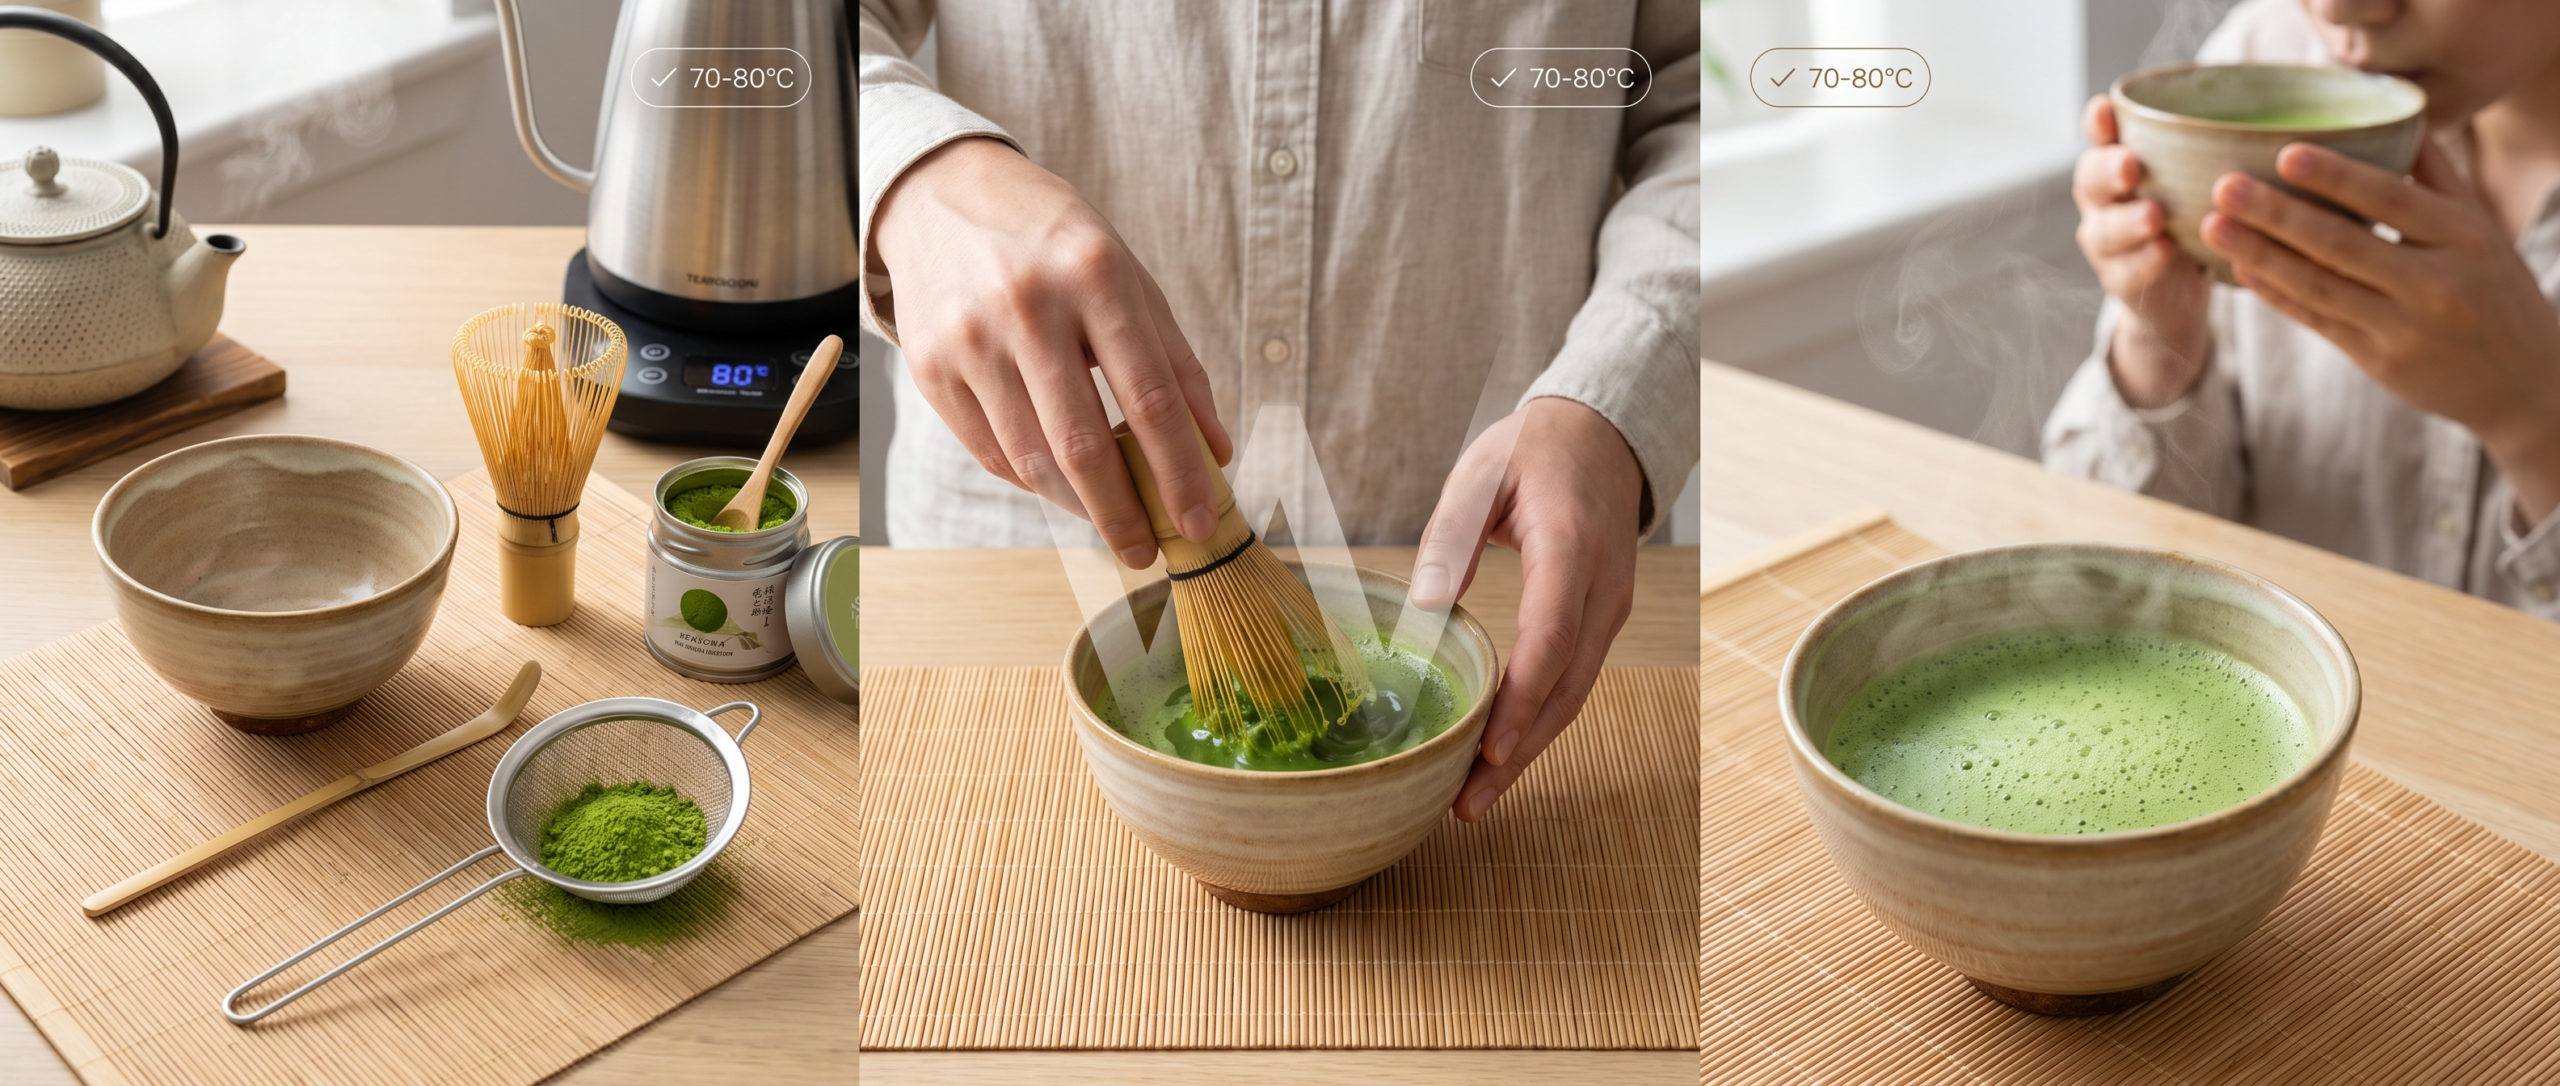
How to Make Matcha: A Beginner’s Guide
A good bowl of matcha takes about two minutes to make and almost nothing to get wrong — once you understand the three things that actually matter: the powder, the water, and the whisk.
Making matcha can look intimidating from the outside. There is the special bowl, the bamboo whisk that resembles nothing else in a Western kitchen, the little scoop, the practiced motion of the hand. It has the air of something that requires training. But the truth is that making a good everyday bowl of matcha is genuinely simple. It requires no ceremony and only a few minutes, and once you understand what each step is actually for, the whole process stops feeling like a ritual you might perform incorrectly and starts feeling like what it is: a quick, satisfying way to prepare a cup of tea.
What follows is a beginner’s guide to doing it well. Before we get to the method, it helps to remember one thing about matcha that makes everything else make sense. Unlike ordinary green tea, which you steep and then strain away, matcha is a powder that you whisk directly into water and drink whole. You are not brewing an infusion of the leaf — you are drinking the leaf itself. If that distinction is new to you, our companion piece explains it in full: Matcha vs Green Tea: What’s the Difference?. It is worth understanding, because it is the reason the powder, the water temperature, and the whisking all matter as much as they do.
What You’ll Need
You can make matcha with improvised tools, and we’ll come to that. But the traditional set exists for good reasons, and each piece earns its place.
The chawan (茶碗) is the tea bowl — wide and open, giving the whisk room to move. The chasen (茶筅) is the bamboo whisk, carved from a single piece of bamboo into dozens of fine prongs; its job is to break up the powder and beat air into the tea, and nothing else does it quite as well. The chashaku (茶杓) is the slender bamboo scoop used to measure the powder. To these, add a fine-mesh sieve (more useful than it sounds), and a way to control your water temperature — ideally a kettle you can set, but a thermometer or even a little patience will do.
And, of course, the matcha itself. This is the single most important choice you will make, because no technique can rescue poor powder. For drinking matcha straight, look for a higher grade — often sold as “ceremonial” — which will be smoother, sweeter, and more vividly green than the coarser “culinary” grades meant for lattes and baking. The quality of the powder starts long before it reaches you, in how and where the tea was grown; if you’re curious about that side of it, our guide to the regional geography of Japanese green tea traces how place shapes what ends up in the bowl.
No technique can rescue poor powder. The single most important decision you make happens before you ever pick up the whisk — which matcha you buy.
Step One: Warm the Bowl and Whisk
Before anything else, pour a little hot water into the empty bowl, swirl it around, and let the tip of the bamboo whisk soak in it for fifteen or twenty seconds. Then tip the water out and dry the bowl.
This small step does two useful things. It warms the bowl, so the matcha doesn’t cool the moment it’s made, and — more importantly — it softens the bamboo prongs of the whisk, making them more flexible and less likely to snap against the bottom of the bowl. A dry whisk plunged straight into thick tea is a whisk that breaks sooner. Thirty seconds here extends its life considerably.
Step Two: Sift the Powder
Matcha clumps. It is a very fine powder, and it packs together in the tin, so if you simply scoop it into water you will end up chasing stubborn little lumps around the bowl — and those lumps mean uneven texture and bitter pockets in the finished tea. The fix is almost embarrassingly simple: push the powder through a fine sieve into the bowl before you add any water.
For a standard bowl of everyday matcha — the thin style called usucha — use roughly two grams of powder, which is about two scoops of the chashaku, or a rounded half-teaspoon if you’re using a kitchen spoon. Sifting takes a few extra seconds and is the step beginners most often skip. It is also the one that most reliably separates a smooth, professional-tasting bowl from a lumpy, amateurish one.
Step Three: Get the Water Temperature Right
This is the step that quietly ruins more bowls of matcha than any other. The instinct, especially if you’re used to black tea or coffee, is to use boiling water. Don’t. Boiling water scorches the delicate powder and pulls out its harshest, most bitter compounds, drowning the sweetness and umami that make good matcha worth drinking in the first place.
The right temperature is around 70 to 80°C (roughly 160 to 175°F) — hot, but well below boiling. If you have a temperature-controlled kettle, set it there. If you don’t, the easy workaround is to boil the water and then let it sit for a couple of minutes, or pour it once between two vessels, which drops the temperature enough. You’ll need only about 60 to 70 ml — a small amount, less than half a mug.
If your matcha ever tastes surprisingly bitter or harsh, water that was too hot is almost always the culprit. Lower the temperature next time and the same powder will taste noticeably sweeter.
Boiling water is the single most common mistake. It scorches the powder and pulls out bitterness. Aim for 70–80°C, and a bowl that tasted harsh will suddenly taste sweet.
Step Four: Whisk
Pour the hot water over the sifted powder, and now the whisk does its work. The motion is the part that looks hard and isn’t. Rather than stirring in circles, whisk briskly back and forth in a straight line — a rapid “W” or “M” shape across the bowl, using your wrist rather than your whole arm. Keep the whisk near the surface rather than grinding it against the bottom.
Do this vigorously for fifteen or twenty seconds. You’re not trying to dissolve the powder so much as to suspend it evenly and beat air into it, and after a few seconds you’ll see a layer of fine froth build across the top. When the surface is smooth and covered in tiny, even bubbles, with no lumps left, it’s done. Lift the whisk out gently, and drink the matcha promptly — it’s at its best right away, before the powder begins to settle back out of the water.
That’s the whole thing. Warm, sift, temper the water, whisk, drink.
A Note on Thin and Thick
What we’ve made here is usucha (薄茶), “thin tea” — the light, frothy, everyday bowl that most people mean when they talk about drinking matcha. There is also a second style, koicha (濃茶), “thick tea,” used in the more formal moments of the traditional tea ceremony. Koicha uses roughly double the powder and about half the water, producing not a frothy drink but a thick, glossy, almost paint-like liquid that is kneaded rather than whisked into froth. It demands the highest grades of matcha and is more an occasion than a habit; for everyday drinking, usucha is what you want, and it’s where every beginner should start.
If You Don’t Have the Tools
You do not need a bamboo whisk to begin. A small kitchen whisk works reasonably well, and in a pinch you can put the sifted matcha and water in a small sealed jar and shake it hard, or use a milk frother, both of which will suspend the powder and produce a passable froth. The results won’t be quite as fine as a chasen gives you — the bamboo really is better at its job — but they are more than good enough to start with, and to decide whether matcha is something you want to make properly. Begin with what you have. The tools can come later.
Making matcha well comes down to respecting a few small things: buying decent powder, sifting out the lumps, keeping the water off the boil, and whisking with a bit of energy. None of it is difficult, and none of it takes long. What it asks for is simply a little attention — the same quiet care that runs through so much of Japanese cooking, where the difference between something ordinary and something lovely is rarely complexity, and almost always the willingness to do the simple things properly. Make a few bowls, pay attention to how each one tastes, adjust, and within a week it will feel like nothing at all.
Read, then Taste
This article is part of Waden’s Technique series — exploring the craft, philosophy, and practice behind Japanese culinary methods. Read more at waden.umamibako.com.
Comment